WhatsMarkSaaS includes a powerful web-based installation wizard that automates the complex setup process for your multi-tenant SaaS platform.
What it does: Provides an intuitive step-by-step installation interface that configures your SaaS platform, tenant isolation, database structure, and initial admin account without requiring manual code modifications.
Why it's essential: The web installer ensures proper multi-tenant architecture setup, handles complex Laravel configuration, and reduces installation errors by automating critical setup steps.
Built on Laravel: WhatsMarkSaaS is developed using Laravel 12 with the TALL stack (Tailwind, Alpine, Livewire, Laravel)
Multi-tenant SaaS Platform: Designed to serve multiple customers (tenants) with complete data isolation
Domain Installation: Install on your main domain or subdomain. The application's root should point to the /public path
Automated Setup: Web installer handles database creation, tenant isolation setup, and initial configuration
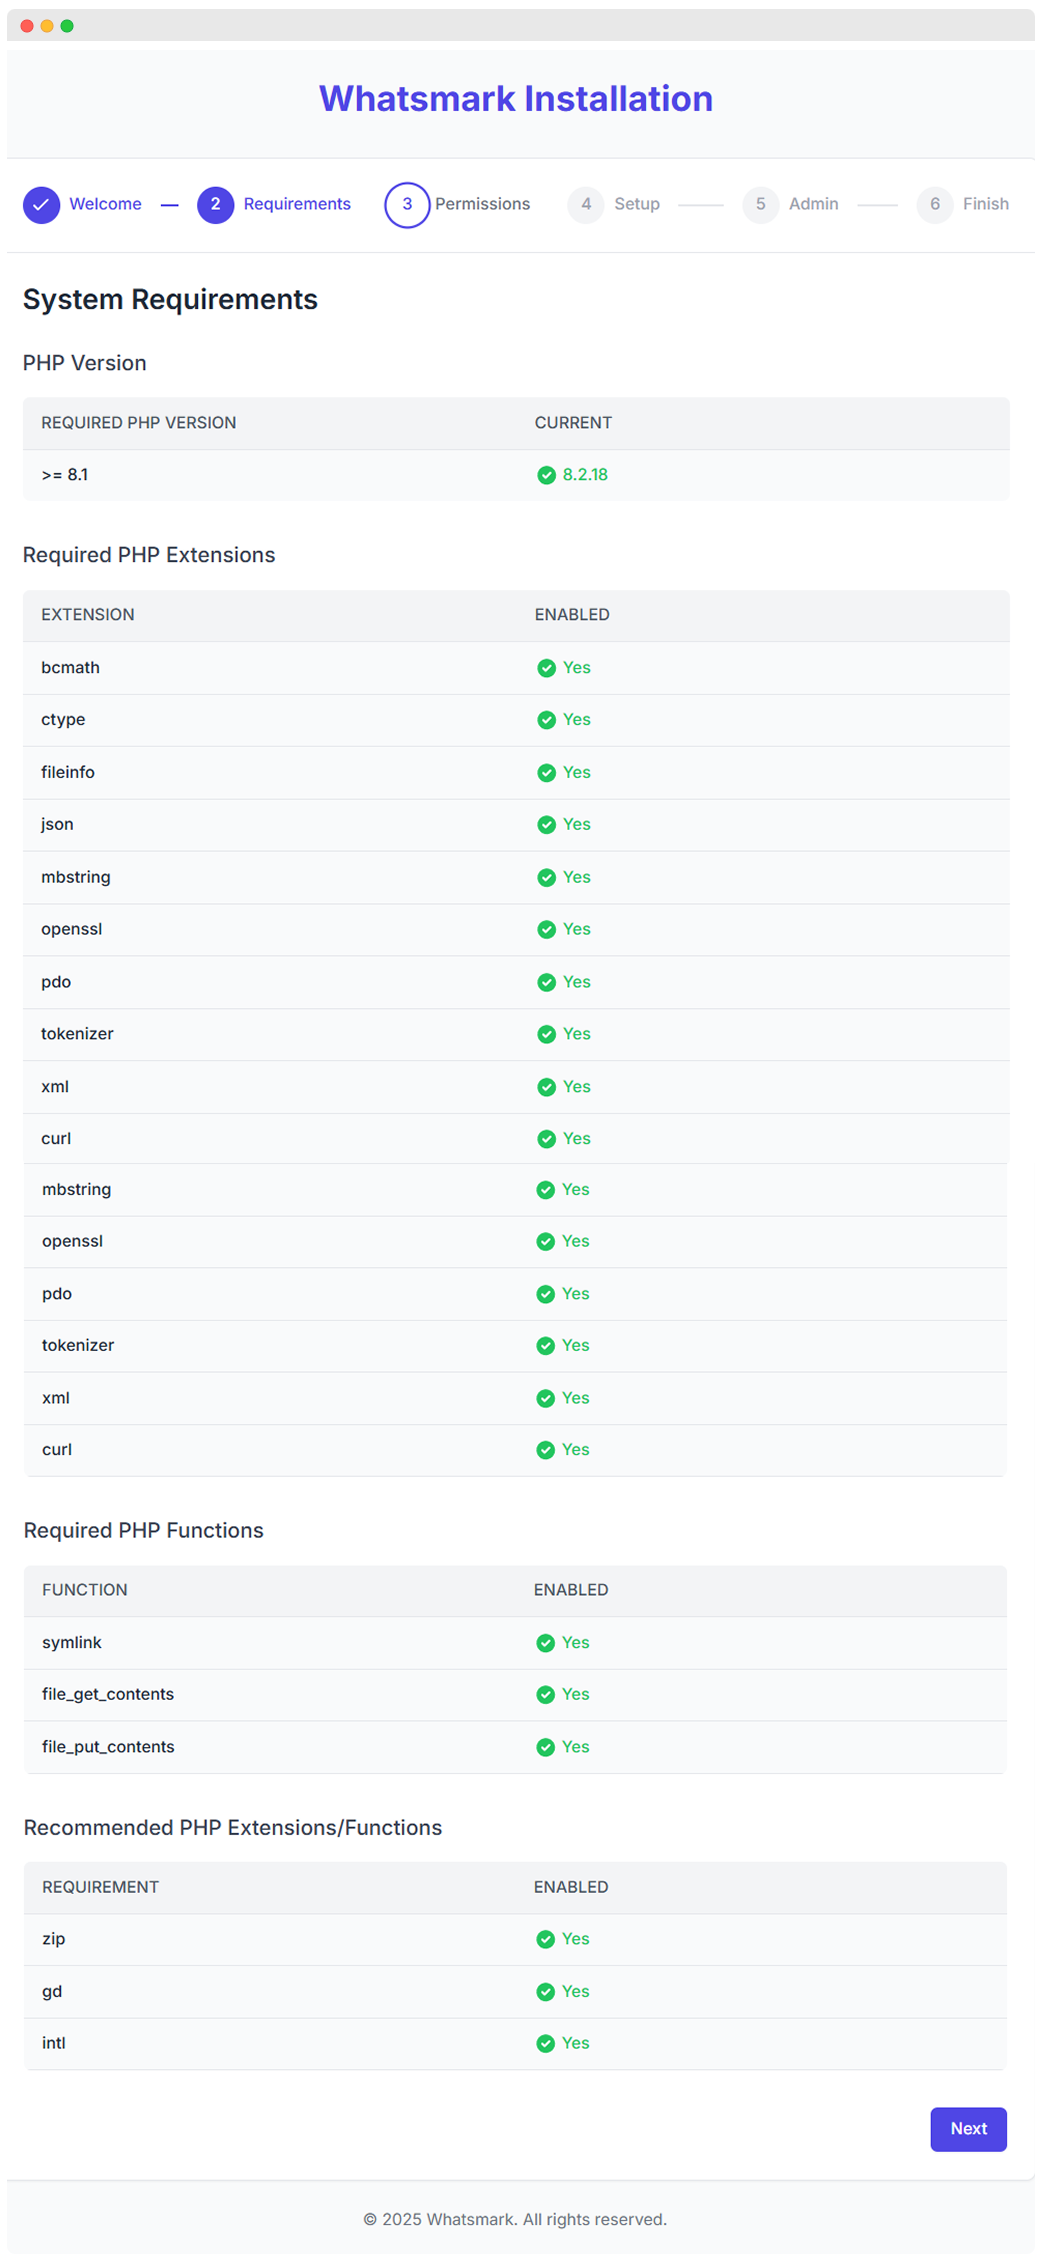
System Requirements Check
Before proceeding with the installation, it's important to review the System Requirements. This ensures your server environment is compatible with WhatsMarkSaaS and can handle multi-tenant operations.
To assist you in the installation process, we provide a quick installation process in video tutorial:
Important Configuration
Ensure that the document root path of your domain/subdomain is set to the /public directory. This step is crucial for the correct functioning of the SaaS application and security.
To set up your Whatsmark installation, a dedicated subdomain is required. Here's how to create it, using whatsmark.example.com domain as an example:
If you don't know how to create subdomain you can take guidance from here create sub domain
Log in to your dashboard by navigating to your hosting provider's login page.
In the cPanel interface, find and click on the Subdomains section.
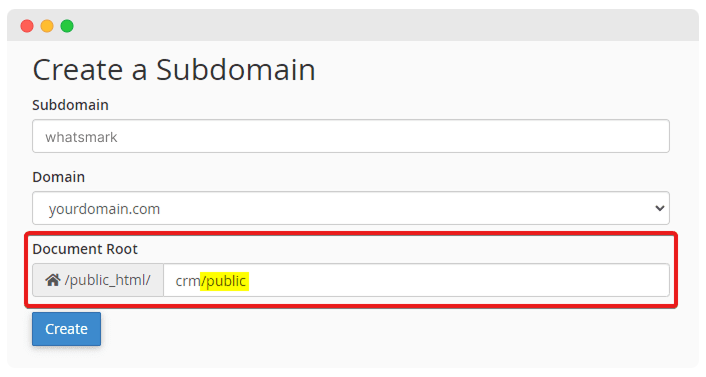
In the Subdomain input, enter Whatsmark in the subdomain field.
Crucial Step: For the Document Root, ensure you input the path to the public directory. This step is essential for the application to function properly.
Click on the Create button to finalize the creation of your subdomain.
IMPORTANT
Whatsmark requires a correctly set up subdomain, as explained in the previous step. Installation in a subfolder without a proper virtual host configuration will not work. If you're installing in a subfolder, consult your hosting provider to create a virtual host with the root path set to path/to/subfolder/public.
To initiate the Whatsmark web installer, you first need to obtain the application files:
Access your Envato account's downloads page or visit the Whatsmark releases page to get the latest release.
Assume you have a subdomain named Whatsmark with the path public_html/whatsmark/.
Ensure you have the correct path where the files need to be uploaded.
TIP
For detailed guidance, refer to the installation videos above.
You should create a dedicated database for your Whatsmark installation. Here's how to create it, using cPanel as an example:
Navigate to www.whatsmark.com/cpanel and log in.
In the cPanel dashboard, locate the Databases section and click on MySQL Databases
TIP
The location of this option might differ depending on your hosting provider.
Click on Create Database. Once created, it will be listed in the Current Databases section.
Establish a new user and assign a secure password. Remember to record the username and password, as you'll need them during the installation process.
Link the new user to your database by selecting both the database and the username. Ensure you grant All Privileges to this user.
Once you have successfully created the subdomain, set up the database, and uploaded the files, you're ready to begin the installation process. Follow these steps to install Whatsmark
Open your web browser and navigate to https://whatsmark.example.com/install. Remember to replace whatsmark.example.com with your actual domain name.
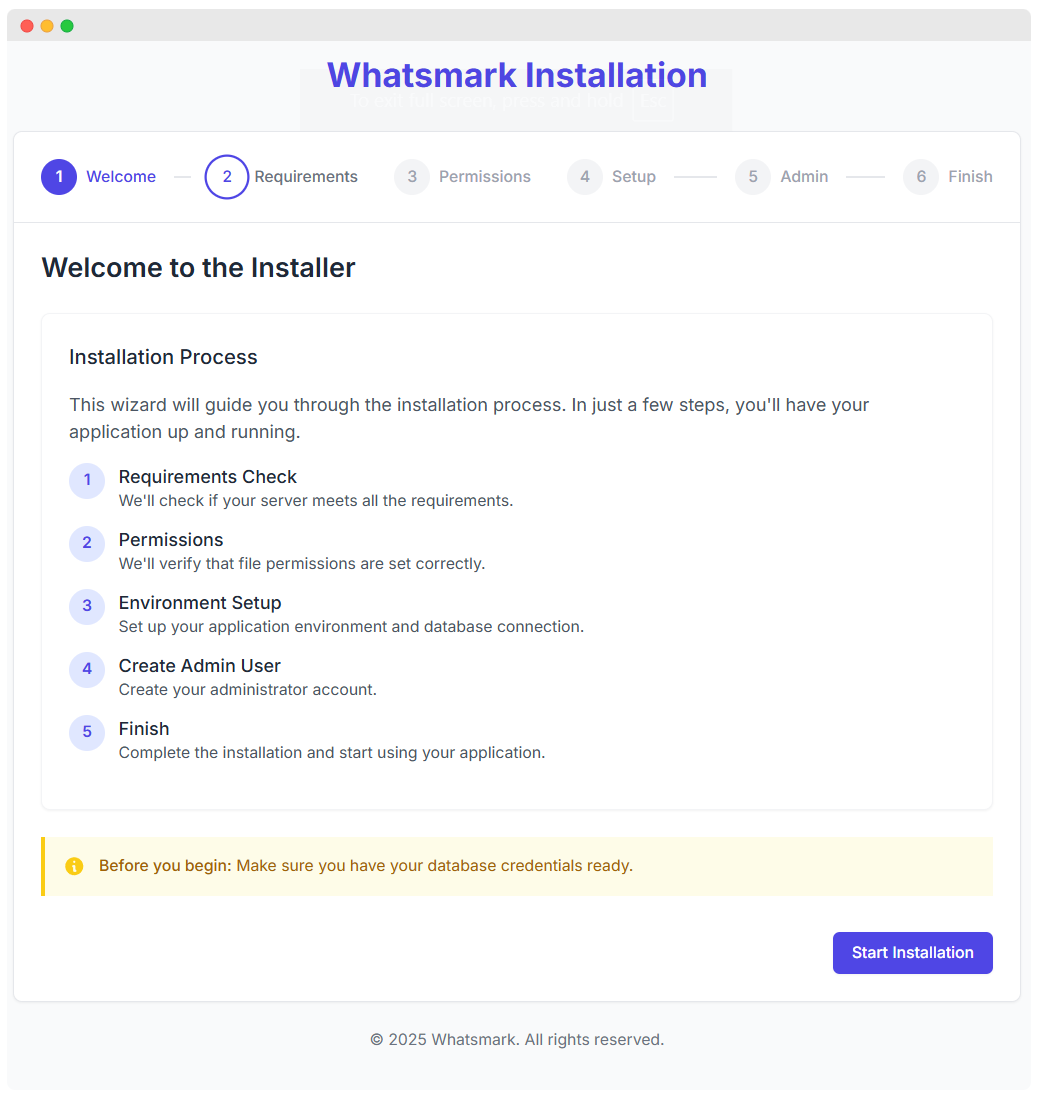
The installer will automatically check if your server meets all requirements.
If you don't see a message regarding the failure of the requirements check, click Start Installation to proceed.
If there are any issues, you'll need to consult with your hosting provider to resolve them before continuing.
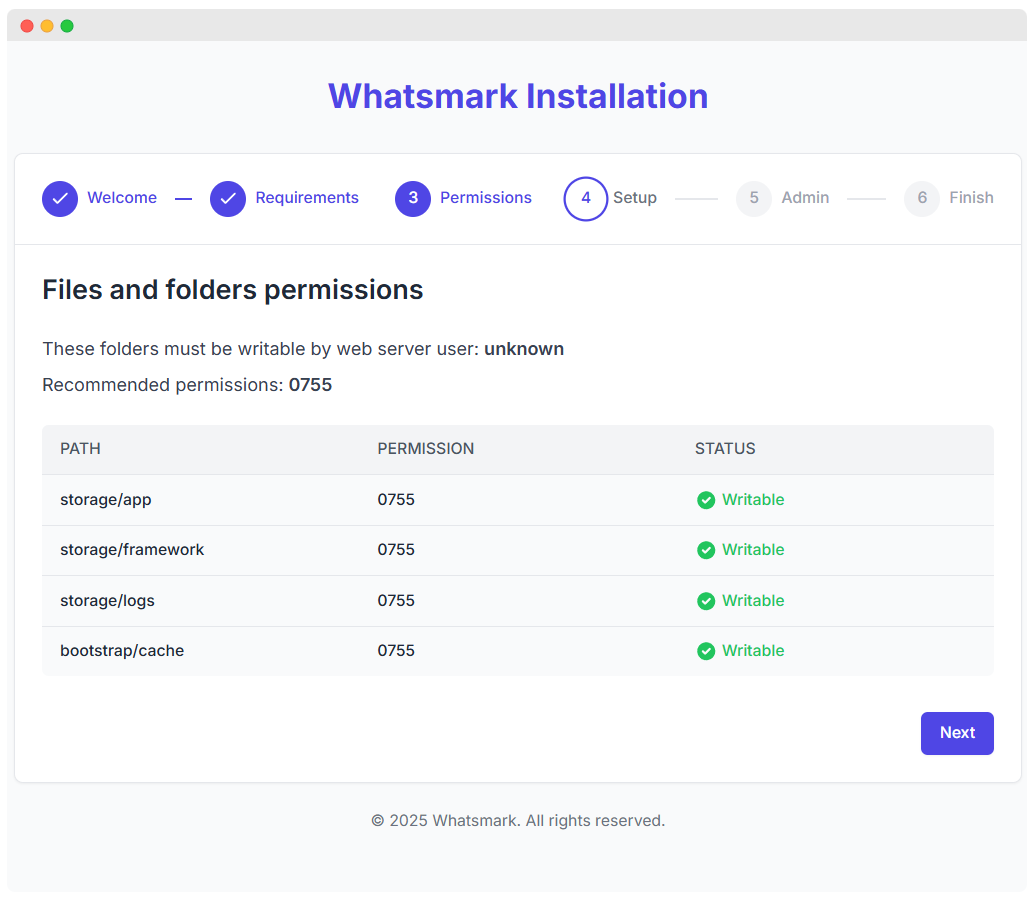
The installer will also check for the correct file and folder permissions.
If permissions are correctly set, click Next to enter application data.
If there are permission issues, you'll need to set 755 permissions for the specified folders. If you are managing the server, refer to the Permissions, User and Group section for detailed instructions.
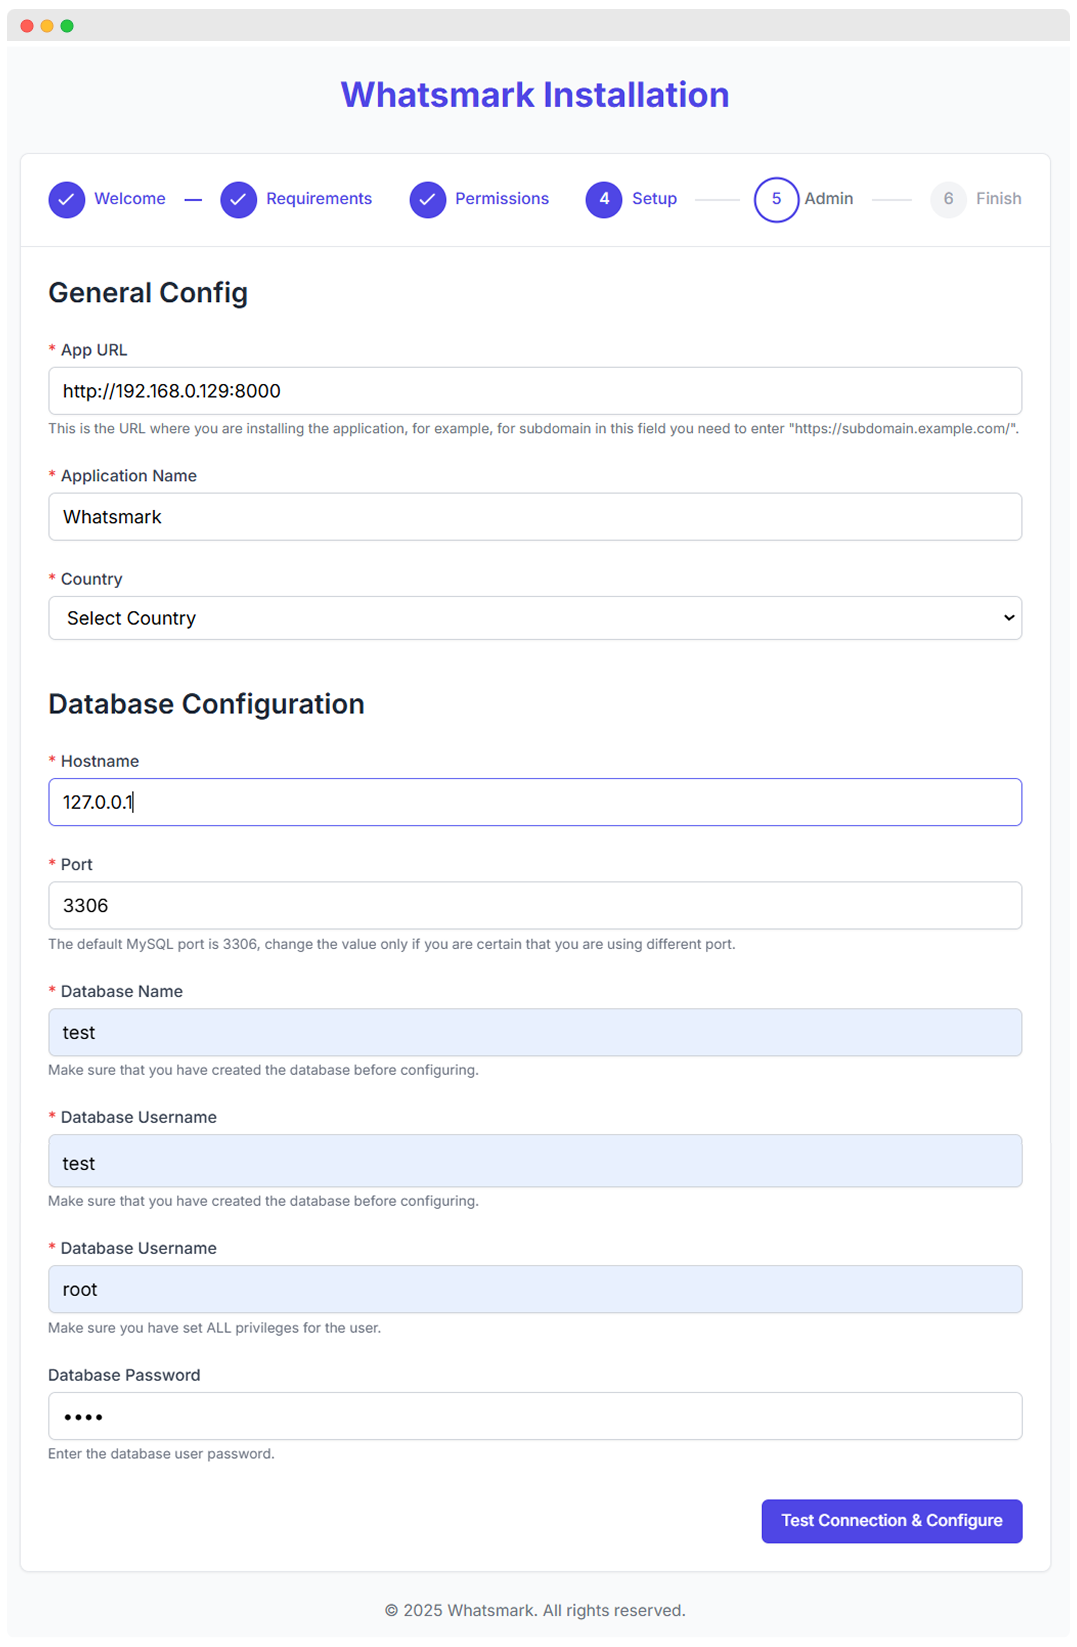
Whatsmark will automatically try to guess the URL where the application will be installed, in our case now from, this example, the URL is http://192.168.0.129:8000. if the URL is wrong, please adjust it accordingly.
You can leave it as default or you can write your own name, for example, Whatsmark
Select your country from the dropdown list.
Enter database hostname, in most cases, the default hostname is localhost, however, if it's different in your case, make sure to set the correct hostname.
In most cases, this value will be 3306 as this port is MySQL default port, if you are not familiar with this option for your server, leave it as it is and continue to the next field, where you will need to configure the database name and user you created in the previous step.
Enter the name of your database
Enter the username that has access to the database
Enter the database user password, for local installations and database users without password, leave it empty.
Click Test Connection & Configure and if the database connection is successful you will be passed to the latest step otherwise please re-check your credentials and hostname.
On the next page, configure administrator user and perform the installation.
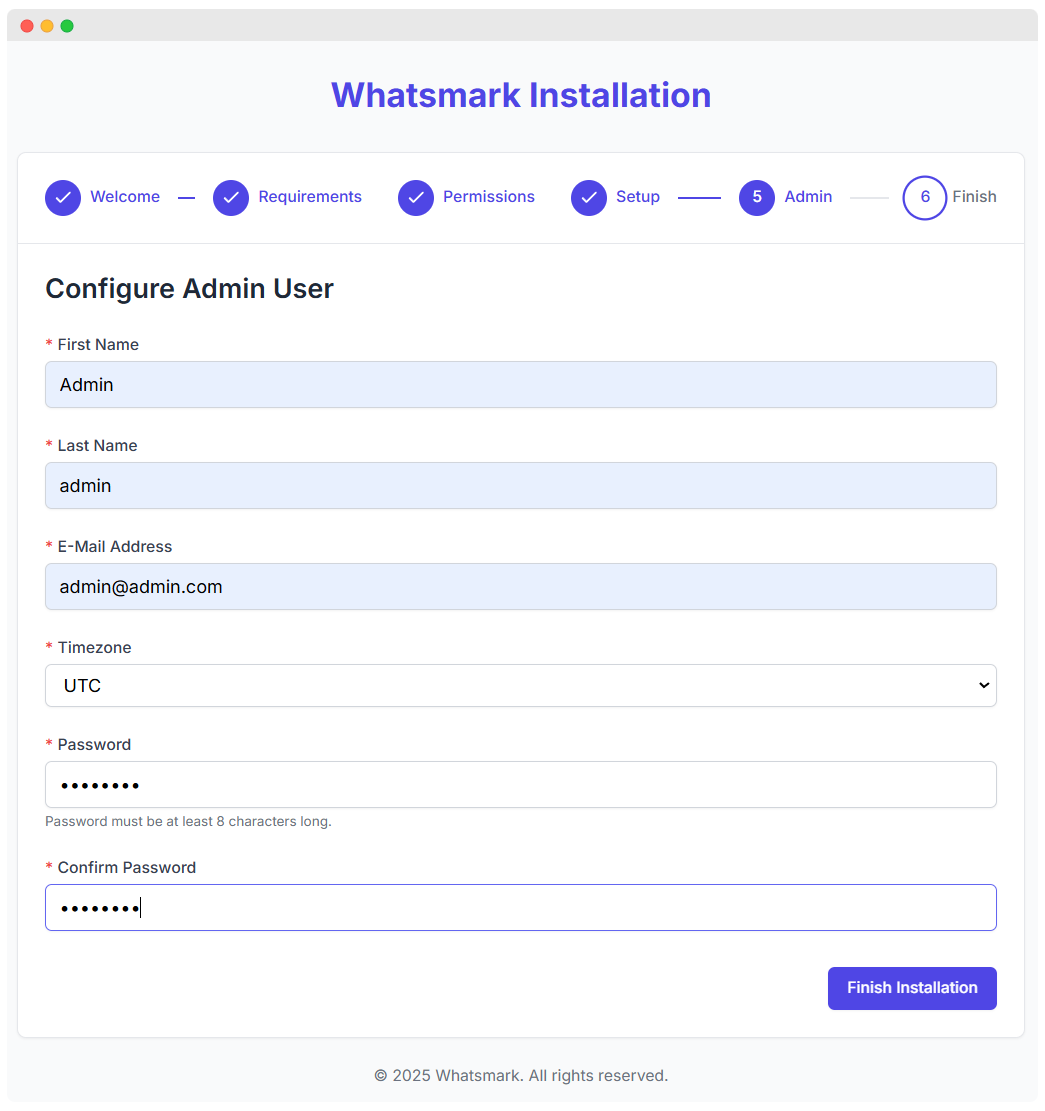
First Name: Enter the first name of the admin user.
Last Name: Enter the last name of the admin user.
E-Mail Address: Provide a valid email address for the admin account.
Timezone: Select the appropriate timezone from the dropdown list
Password: Enter a secure password for the admin account.password must be at least 8 characters long.
Confirm Password: Re-enter the same password to confirm it.
Click Finish Installation button to complete installation process.
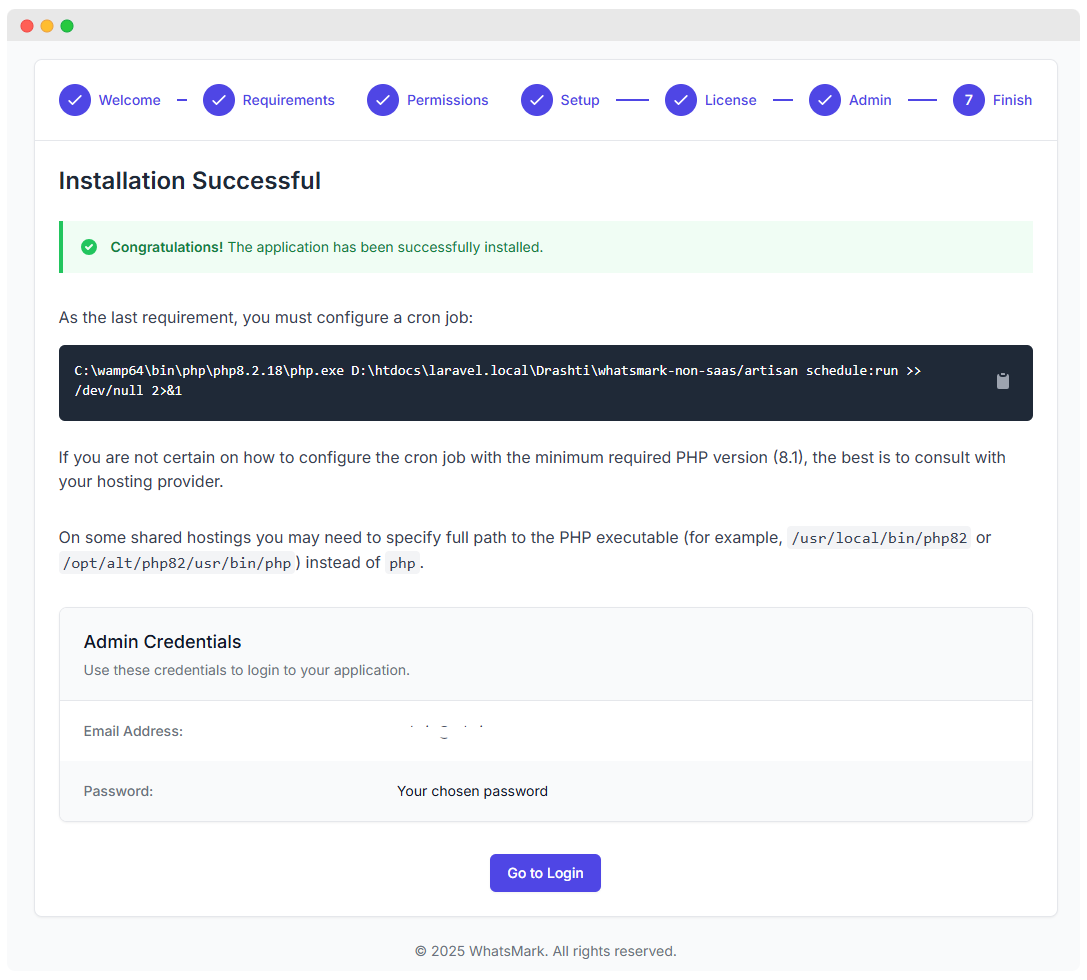
After you finish all the installation steps you will be presented with a installation successful screen where there will be information on how to configure cron job as well the guessed command and the path for the cron job.
Don't forget to copy the command/path so you can configure a cron job as explained here.
TIP
The installation success page will be available for 1 hour after installation, after 1 hour, when you visit the same URL, a 404 error will be shown.
If you are managing the server and you are already familiar with Laravel, probably you will know that for Nginx you will need to create separate configuration file so Whatsmark can be served.
The examples below are for installation on the root domain, but feel free to adjust the paths for the subdomain if you want to perform an installation on a subdomain.
server {
    listen 80;
    server_name example.com;
    root /example.com/public;

    add_header X-Frame-Options "SAMEORIGIN";
    add_header X-XSS-Protection "1; mode=block";
    add_header X-Content-Type-Options "nosniff";

    index index.html index.htm index.php;

    charset utf-8;

    location / {
        try_files $uri $uri/ /index.php?$query_string;
    }

    location = /favicon.ico { access_log off; log_not_found off; }
    location = /robots.txt  { access_log off; log_not_found off; }

    error_page 404 /index.php;

    location ~ \.php$ {
        fastcgi_pass unix:/var/run/php/php8.2-fpm.sock;
        fastcgi_index index.php;
        fastcgi_param SCRIPT_FILENAME $realpath_root$fastcgi_script_name;
        include fastcgi_params;
    }

    location ~ /\.(?!well-known).* {
        deny all;
    }
}If you are managing the server, you will need to make sure that the proper permissions are applied to all files and folders and also the files and folders belong to the user and group responsible for managing the web server, in most cases is www-data.
Keep in mind that you won't need to apply the commands below if your server is managed by your server provider, for example, shared hosting as the permissions and the group will be already configured for you.
find /var/www/example.com -type d -exec chmod 755 {} \;find /var/www/example.com -type f -exec chmod 644 {} \;sudo chown www-data:www-data -R /var/www/example.comTIP
Don't forget to adjust the values in the example codes according to your setup.
After the installation succeeded, to ensure everything is up to date with latest features and fixes, it's highly recommended to check if there are any patches or updates available, you can do this in Settings -> System -> Update
Whatsmark requires a properly configured cron job in order all the features to work as expected, learn more how to configure Laravel cron job.
You should configure a system email account to act as a general email account that the system will use to send system-related emails like password reset, user assigned to contact, activity due reminders, etc...
Refer to the system email account configuration page for more information.
Whatsmark installation creates a default brand that will be used for the documents feature, make sure that the brand information and settings are accordingly set as per the brand requirements.